
📎 Read Part 1 First:
If you haven’t seen the first part where we trained and deployed a machine learning model using OCI Data Science, start here:
👉 Part 1: Train and Deploy ML Model in OCI Data Science
Introduction
Welcome back! In Part 1, we trained a RandomForestClassifier using the Iris dataset, deployed it in OCI Data Science, and exposed it as a REST API:
Now, in Part 2, we’ll build the Oracle APEX application that connects to this model to:
- Accept user input (flower measurements).
- Call the REST API endpoint.
- Show the predicted flower class and its image.
- And debug the entire request-response flow.
Let’s dive in and bring machine learning into APEX!
Prerequisites
Before you can connect your Oracle APEX application to the deployed model in OCI Data Science, you’ll need to perform some one-time setup steps to allow secure communication between the two.
1. Create an API Signing Key in OCI
Oracle APEX uses Web Credentials to authenticate against external services like the OCI REST APIs. To configure this, you first need an API signing key pair.
- Log in to the OCI Console, go to Identity → Users, select your user.
- Under API Keys, click Add API Key, and upload the
oci_api_key_public.pemfile.
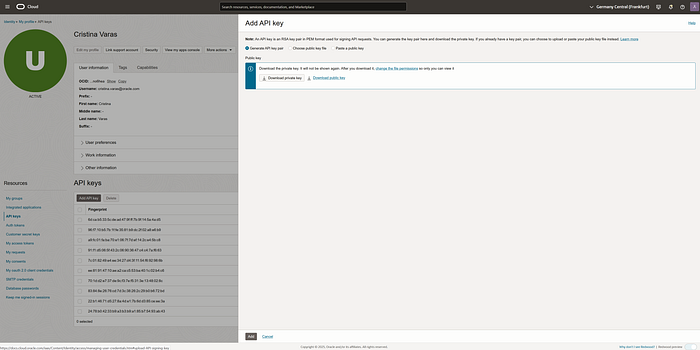
Save your:
- User OCID
- Tenancy OCID
- Fingerprint (will appear after you add the key)
- Private Key (
oci_api_key.pem)
2. Creating a Web Credential in APEX
To simplify interactions with OCI services, you can create a Web Credential in APEX for secure and reusable authentication.
- Navigate to Web Credentials:
Go to “Workspace Utilities” > “Web Credentials.”
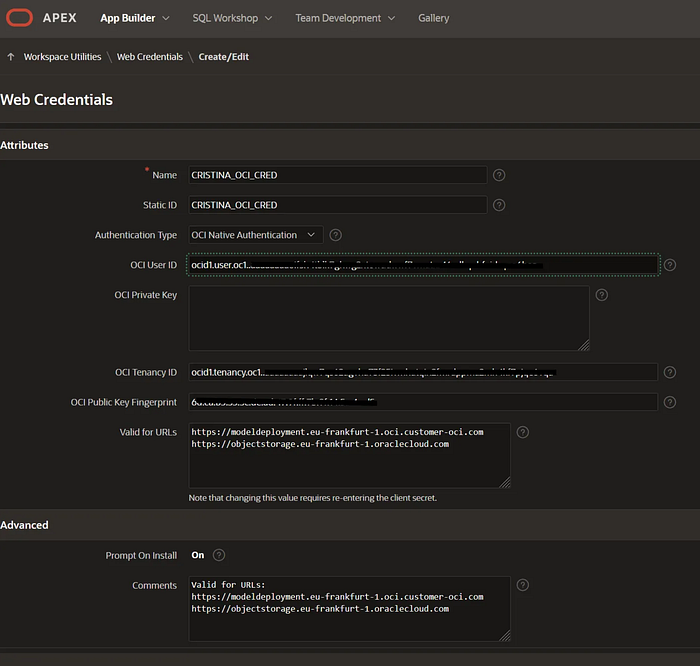
2. Create a New Credential:
Name: YOUR_OCI_CRED.
Authentication Type: OCI Native Authentication.
Fill in the required fields:
- OCI User ID
- OCI Private Key (paste your private key)
- OCI Tenancy ID
- OCI Public Key Fingerprint
Specify valid URLs for access, such as: https://modeldeployment.eu-frankfurt-1.oraclecloud.com
4. Make sure the Model is Active and Deployed
After completing the model training and deployment steps in Part 1, it’s essential that your model is running and accessible before APEX can interact with it.
You can confirm this in the OCI Console by:
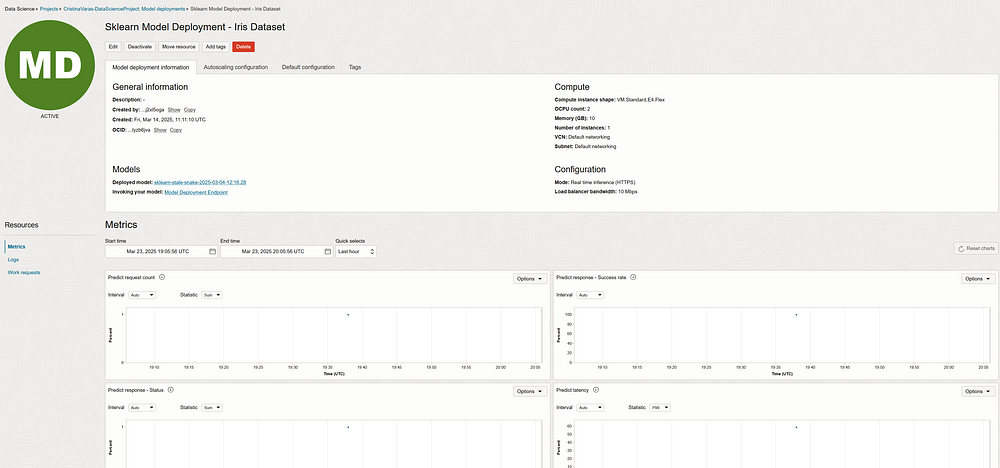
- Navigating to your Model Deployment under: Data Science → Projects → <Your Project> → Model Deployments
- Opening your deployed model (e.g., “Sklearn Model Deployment — Iris Dataset”).
- Checking that:
- The status is
ACTIVE - The endpoint is visible and clickable (under Invoking your model)
4. Verifying the deployment configuration:
- Compute shape: e.g.,
VM.Standard.E4.Flex - OCPU count: e.g.,
2 - Memory: e.g.,
10 GB - Mode:
Real time inference (HTTPS) - Load balancer bandwidth:
10 Mbps
📈 You can also view metrics like:
- Predict request count
- Response success rate
- Latency
🔄 If your model is not active, APEX will not be able to get a response and will likely throw an error in the PL/SQL block (timeout or 500 error).
So before testing your APEX application, double-check that your model deployment is fully live and ready to receive requests.
The Page Layout — Let’s build the Application!
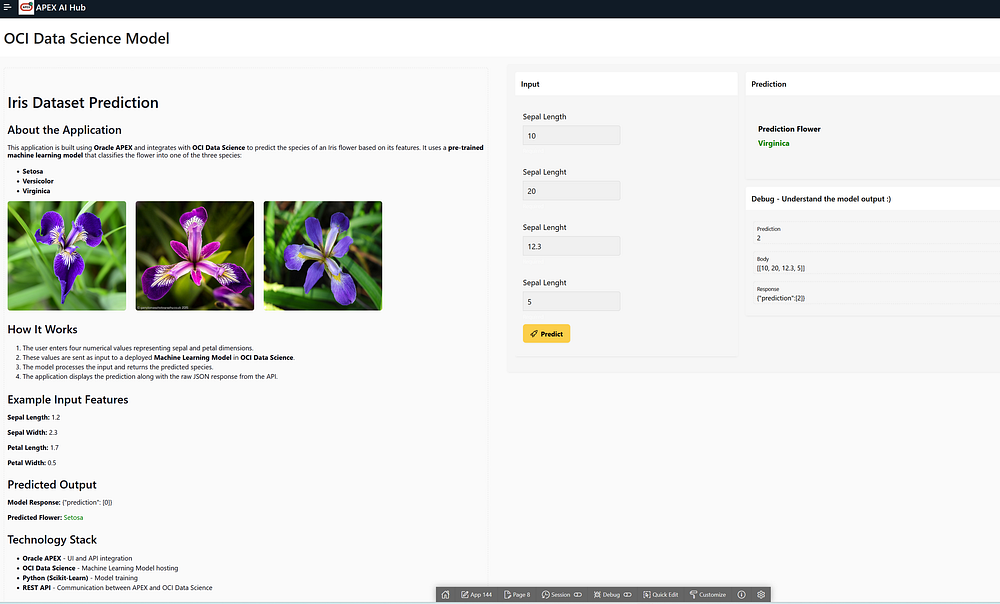
Our APEX page is called “OCI Data Science Model”. It consists of:
- A description region on the left to explain the model.
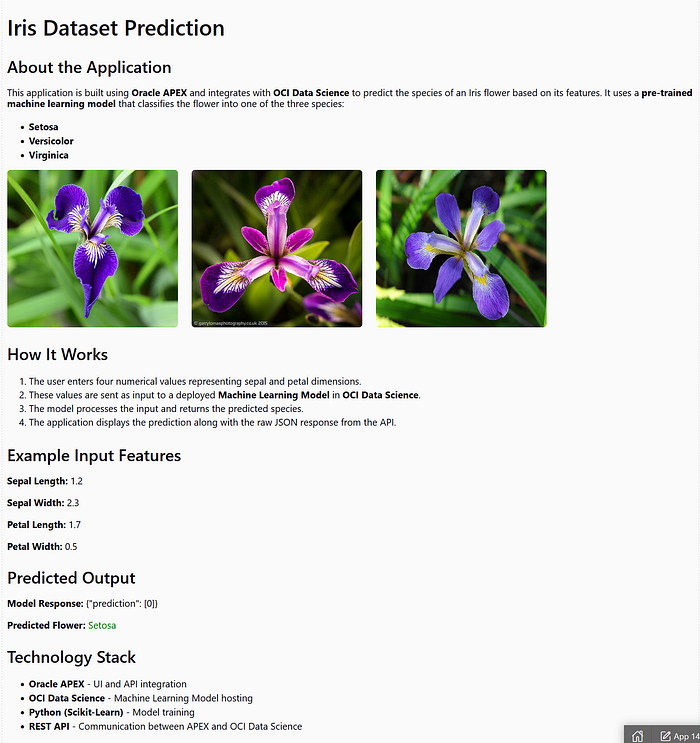
- This region is created using a static content region in APEX with HTML markup, and it’s fully customizable using inline CSS or external styles.
- It uses standard HTML elements like
<h1>,<h2>,<p>,<ul>,<ol>, and<div>. <img>tags to show flower images. - The styling is applied using a
<style>block that sets the font, spacing, colors, and layout. Also adds containers with borders and shadows and uses Flexbox for image alignment.
💡 Tip: You can paste your HTML and CSS directly into a Static Content region in Oracle APEX. This makes it easy to:
- Control the look and feel of your description section.
- Display images using
#APP_FILES#paths. - Enhance readability and visual appeal of your app.
2. A prediction region on the right, made up of 3 subregions:
- Input (user inputs + button to call the API).
- Prediction (to display the flower prediction).
- Debug (to view raw JSON request, response, and prediction result).
Subregion 1: Input (User Entry + Action)
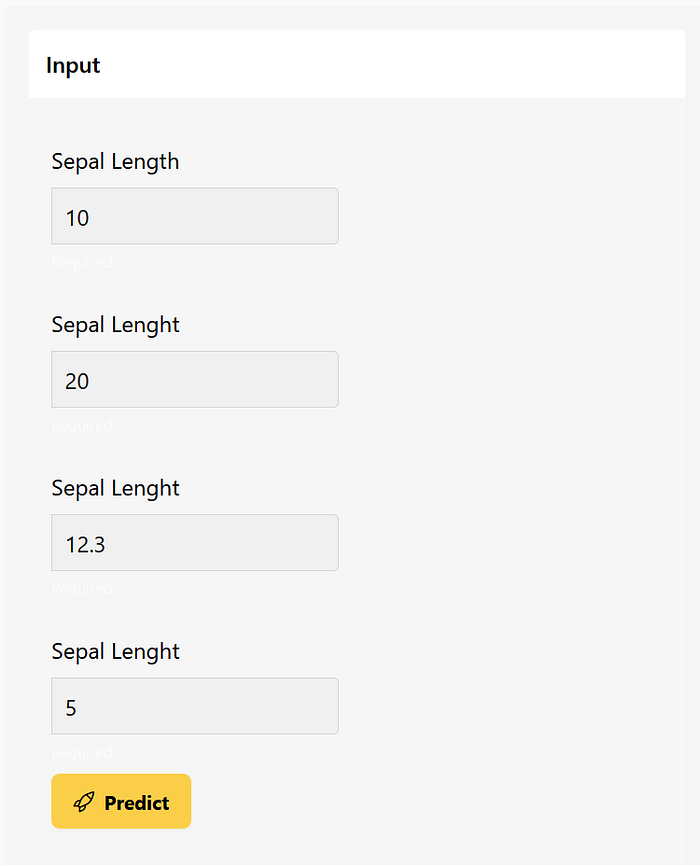
This section includes four input fields:
P8_SEPAL_LENGTH:Length of the sepal in centimeters (E.G: 5.1)P8_SEPAL_WIDTH:Width of the sepal in centimeters (E.G: 3.5)P8_PETAL_LENGTH:Length of the petal in centimeters (E.G: 1.4)P8_PETAL_WIDTH:Width of the petal in centimeters (E.G: 0.2)
And a “Predict” button that triggers a PL/SQL Process when clicked.

Quick Refresher: What are sepals and petals?
- A sepal is one of the outer parts of a flower that protects the bud before it opens.
- A petal is one of the colorful parts of the flower that helps attract pollinators.
Here’s a visual example for reference (if you’re publishing this on Medium, you can include an image of an iris flower showing sepals and petals):
Why do we need these?
These four measurements are the input features that the machine learning model uses to predict the type of iris flower (Setosa, Versicolor, or Virginica).
The model has been trained to understand patterns in these values and determine the correct class based on historical data.
So when a user enters these values in the APEX form, you’re feeding them into a live machine learning model hosted in OCI.
The PL/SQL Code (Explained Line-by-Line)
✅ This PL/SQL block sends the prediction request, receives a response, and maps the prediction to a flower name:
DECLARE
    l_url          VARCHAR2(4000) := 'https://modeldeployment.[...]/predict';
    l_clob_request CLOB;
    l_clob_response CLOB;
    l_prediction   VARCHAR2(100);
    l_flower_name  VARCHAR2(50);
    l_image_url    VARCHAR2(100);
BEGIN
    -- 1. Construct input JSON from APEX items
    l_clob_request := '[[&P8_SEPAL_LENGTH., &P8_SEPAL_WIDTH., &P8_PETAL_LENGTH., &P8_PETAL_WIDTH.]]';
    :P8_BODY := l_clob_request;

    -- 2. Set REST headers
    apex_web_service.g_request_headers(1).name := 'Content-Type';
    apex_web_service.g_request_headers(1).value := 'application/json';

    -- 3. Make the POST request to the model endpoint
    l_clob_response := APEX_WEB_SERVICE.MAKE_REST_REQUEST(
        p_url                  => l_url,
        p_http_method          => 'POST',
        p_body                 => l_clob_request,
        p_credential_static_id => 'cristina_oci_web_credentials2',
        p_transfer_timeout     => 30
    );
    :P8_RESPONSE := l_clob_response;

    -- 4. Parse prediction from the JSON response
    APEX_JSON.PARSE(l_clob_response);
    l_prediction := APEX_JSON.get_varchar2('prediction[1]');
    :P8_PREDICTION := l_prediction;

    -- 5. Map to friendly name + image
    CASE l_prediction
        WHEN '0' THEN
            l_flower_name := 'Setosa';
        WHEN '1' THEN
            l_flower_name := 'Versicolor';
        WHEN '2' THEN
            l_flower_name := 'Virginica';
        ELSE
            l_flower_name := 'Unknown Flower';
    END CASE;

    -- 6. Save results
    :P8_PREDICTION_FLOWER := l_flower_name;

EXCEPTION
    WHEN OTHERS THEN
        :P8_PREDICTION := 'Error: ' || SQLERRM;
END;
Explanation of the Code
1. Define Variables and URL
l_url := 'https://modeldeployment.../predict';
This is the REST endpoint of the deployed model in OCI Data Science.
2. Prepare the JSON Input
l_clob_request := '[[&P8_SEPAL_LENGTH., &P8_SEPAL_WIDTH., &P8_PETAL_LENGTH., &P8_PETAL_WIDTH.]]';
This line builds the input as a JSON array using the APEX page items entered by the user.
:P8_BODY := l_clob_request;
Stores the input JSON into a page item so we can display it later for debugging.
3. Set the Request Headers
apex_web_service.g_request_headers(1).name := 'Content-Type';
apex_web_service.g_request_headers(1).value := 'application/json';
These headers tell the API that we are sending JSON data.
4. Make the REST API Call
l_clob_response := APEX_WEB_SERVICE.MAKE_REST_REQUEST(
    p_url => l_url,
    p_http_method => 'POST',
    p_body => l_clob_request,
    p_credential_static_id => 'cristina_oci_web_credentials2',
    p_transfer_timeout => 30
);
- Makes a POST request to the endpoint.
- Sends the input JSON in
p_body. - Uses stored credentials (
Web Credentials) to authenticate securely.
:P8_RESPONSE := l_clob_response;
Stores the full response JSON into a page item for inspection.
5. Parse the JSON Response
APEX_JSON.PARSE(l_clob_response);
l_prediction := APEX_JSON.get_varchar2('prediction[1]');
- Parses the returned JSON string.
- Extracts the actual prediction (e.g.,
"1") from thepredictionarray. - The prediction is a numeric class: 0 = Setosa, 1 = Versicolor, 2 = Virginica.
:P8_PREDICTION := l_prediction;
Stores the raw prediction for debugging or further use.
6. Convert Prediction to Name
CASE l_prediction
    WHEN '0' THEN ...
    WHEN '1' THEN ...
    WHEN '2' THEN ...
Maps the numeric result to a human-friendly flower name.
:P8_PREDICTION_FLOWER := l_flower_name;
7. Handle Exceptions
EXCEPTION
    WHEN OTHERS THEN
        :P8_PREDICTION := 'Error: ' || SQLERRM;
If anything goes wrong (invalid JSON, timeout, wrong credentials, etc.), this fallback sets a human-readable error message in P8_PREDICTION.
Items to Submit and Return
This step is critical for interaction between APEX and your process.
- Items to Submit:
These must be submitted to the server when the PL/SQL is executed.P8_SEPAL_LENGTH, P8_SEPAL_WIDTH, P8_PETAL_LENGTH, P8_PETAL_WIDTH - Items to Return:
These are updated in APEX after the PL/SQL process runs.P8_PREDICTION, P8_BODY, P8_RESPONSE, P8_PREDICTION_FLOWER, P8_IMAGE_URL
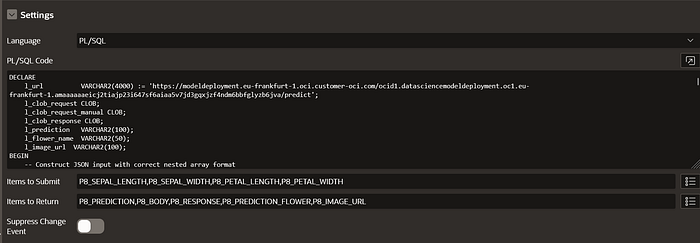
Without this setup, values won’t be passed to or updated after the process.
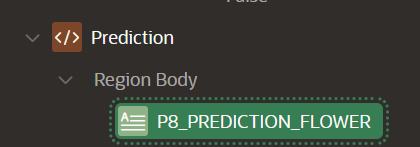
Subregion 2: Prediction Display
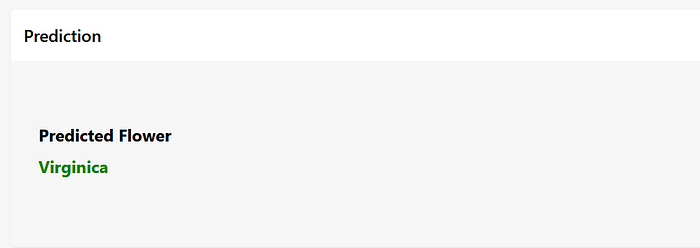
This region simply shows the results of the prediction:
- P8_PREDICTION_FLOWER → A display-only field showing the flower name.
Optional enhancements:
- Add a color-coded badge depending on the class.
- Show a confidence score if available in the response.
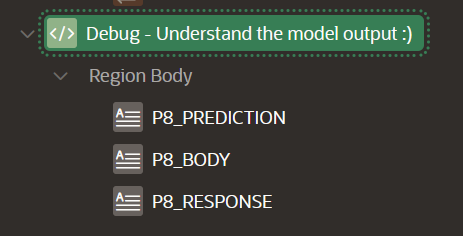
Subregion 3: Debug (For Development)
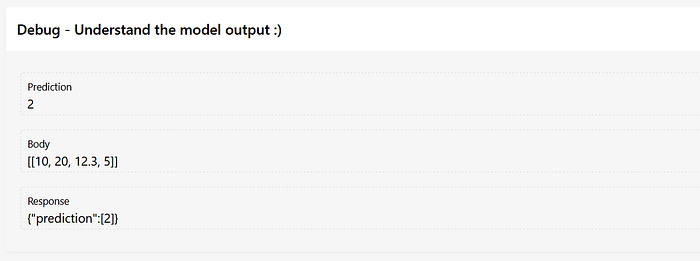
This region is meant to help troubleshoot:
P8_BODY→ The raw JSON input sent to the API.P8_RESPONSE→ Full raw JSON response from the model.P8_PREDICTION→ The raw class value (0, 1, 2).
These values are crucial during development and can be hidden later in production for end-users.
Result in Action
Once you enter values (e.g. 5.1, 3.5, 1.4, 0.2) and hit Predict, the app:
- Calls the deployed model on OCI.
- Receives the predicted class.
- Shows the flower name and its image.
- And logs the full request-response for debugging.
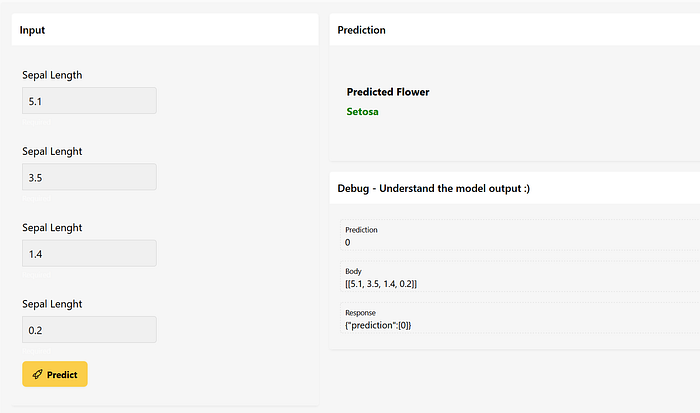
Simple, fast, and powerful!
Bonus Tips
- You can use Dynamic Actions to show/hide sections based on results.
- Consider adding loading indicators while waiting for the prediction.
- Add a chart or history log to track predictions over time.
Conclusion
With just a few APEX regions, some page items, and a PL/SQL block, you’ve connected Oracle APEX to a live machine learning model deployed in OCI! 🎉
This example is simple but powerful — and can be extended to any model: sentiment analysis, sales forecasting, anomaly detection, and more.
Stay tuned for future tutorials!
If you enjoyed this, follow me on Medium and connect on LinkedIn for more hands-on AI + APEX content!
Happy coding! 🙂